Showing posts with label Makeover. Show all posts

Monday, November 11, 2013

The Sister Makeover feat. Burberry Rosewood

Though I am by no means a trained makeup artist, my family tend to rope me into applying their makeup anytime they have a special event to attend. Indeed, when we are all going to the same event I often spend more time on their face than my own and they end up looking extra amazing (but don't worry, I always take the credit for it!) My sister recently attended a wedding and came to me to pretty up her face - here is the result!
I can't take credit for her side-swept hair (hair stylist I most definitely am not!) but I used some slightly grey-toned neutrals to just subtly define her eyes - she didn't want to go too dark for the daytime ceremony! I didn't manage to capture a photo of her front on without a funny face involved, so here is a picture of the back of her hair which looked so amazing! The plait ran from the side of her head around the back and into the flipped section which was loosely curled, and though I may be biased she looked so good!
I normally use the warmer shades from the Urban Decay Naked Palette on her (as she is quite tanned) but I went for cooler toned shades from other brands this time to mix it up a little bit. I swept Burberry Rosewood over the lid and then defined the crease with Too Faced Garter Belt, before highlighting the brow bone with Too Faced In The Buff. I went heavy with the highlight in the inner corners with Sin, and the look was complete!
Do you have a go-to look when you attend a wedding?
Do you intensify your makeup before the reception, or go all out from before the ceremony?

Emma @ emmabovarybeauty

Monday, June 24, 2013

Mumma Bovary + Clarins, a match made in heaven


It is a common occurrence to see Mumma Bovary nudging me for a ‘wee spruce up’, and of course I don’t mind indulging her in a makeover every now and again. It seems my mind was subconsciously in a ‘Clarins state of mind’ as a whole lot of the products I threw in front of her were from the beautiful brand. Below are the products that she ended up choosing, though I admit that the Lip Perfector was my choice as I have always been curious about how she would look with paler glossy lips.

Of all of the single shadows and palettes I placed in front of Mumma B, the Odyssey Quartet (review here) was the very first thing she grabbed for. The gold leaf shade seems to instantly win hearts, but for this makeover I decided to use the 3 other (quite sheer) shades to define her eyes but keep it naturally pretty.  I then move onto the base, and Mum wanted to try a BB cream for the first time so we left the Ever Matte* (my sisters favourite!) to the side. The Clarins BB Skin Perfecting Cream* is too dark for my uber pale mug, but it is spot on for Mum so that is a plus. It was really easy to blend in and looked good, thumbs up Clarins, though was similar to a tinted moisturiser in my opinion.


Cheeks were ticked off with the Clarins Colour Accents Powder and Blush*is it a blush, bronzer, or powder? I typically use this as a beautiful neutral blush, and the bronze action helps warm up the face while the palest section can work well all over if used sparingly. This looked oh so sexy on Mumma Bovary, and she was pretty thrilled with how different the neutral shade made her face look. The one blush she owns (a Savvy one she nicked from me!) is quite pink (see it in this post) and this is such a different look on the cheek.
 
I then handed Mumma Bovary the Clarins Instant Light Natural Lip Perfector in Rose, and she was quite dubious about the pale pink shade with a flat sponge applicator. She didn’t mind the way it felt on her lips (they are quite smooth and smell yummy) but the shade ended up being too pale for her, and washes her out quite a bit. I guess it just shows why it is tough to do makeup on others- we are so used to our own colouring and style!

We then switched to the Instant Smooth Crystal Lip Colour in Crystal Coral, and though it took a bit of manoeuvring to get the bright pop of coral even on the lip, it looked beautiful on her! My mum loves bright or dark lip colours like berries and deep pinks, so this was definitely a more suitable lip choice for her tastes.
 
Do you prefer Crystal Coral on Mumma Bovary as well?
What colour eyeshadow do you think we should play with for her next post?
 
*Marked items were provided for consideration. This isn’t a sponsored post and I didn’t intend for it to be Clarins-centric!

Thursday, August 23, 2012

dolling up a little one

My beautiful niece turned 7 over the weekend, and celebrated with a glamour party with all of her friends. My sister set up a (fake) tattoo parlour, hair curling, coloured hair spray, a nail salon and a makeup spot for the kids to explore, with someone manning each section. Can you guess which I was in charge of?
I gave the kidlets choice when adding some sparkle to their party looks (and don't worry, everything was sanitized and no sticky fingers smooshed my makeup-phew!) They liked having the power to decide what they could wear, and I think overall it went well.
Biggest hit was definitely the BYS Diamond Shadow palette in Miami Beats*, which is chock-full of glitterific pastel shades (the kids went nuts for the pink, lo and behold) The essence Swirlpool blush also went down well, the sheen this gives is a sight to see, one of the prettiest blushes I own for sure. No love for MAC's Full Of Joy blush, the kids aren't fond of lavender it turns out. You learn something new every day!
The only ones who went for the Clinique Strawberry Fudge palette were my older niece and her friend, who weren't excited by the glitter and wanted to wear ladylike shades. The Gold Rush shade in the bottom left hand corner is such a stunner, FYI.
I gave all of the kids the choice of two Vera Wang perfumes (Princess and Glam Princess) and four lipglosses (which I applied onto the back of my hand and then onto their lips with a sanitised brush) The only one that wasn't chosen was the Mirenesse shade, they all wanted brighter pink shades so this fell by the wayside. Hello Kitty's Baby Lip looked great on, and as always my love for the essence stay with me glosses knows no bounds.
What would a 7 year old makeover be without a ton of shimmer? The new L'Occitane Pivoine Delicate Shimmering Powder* comes out with the nicest little 'puff' and the kids thought it was awesome (I think it is awesome as well!) The Vani-T Diamond Dust in Moon & Stars* is something I use on my cheekbones, and when I was finished with them the kids were all glowing like little rays of golden sunshine!

What would you do if asked to make over 30 children?
How often do you shimmer up your makeup routine?
*Marked products were provided, but used in this makeover because they are lovely and suited to occasion perfectly. Honesty, always.


Wednesday, May 9, 2012

Mums Marvellous Makeover!

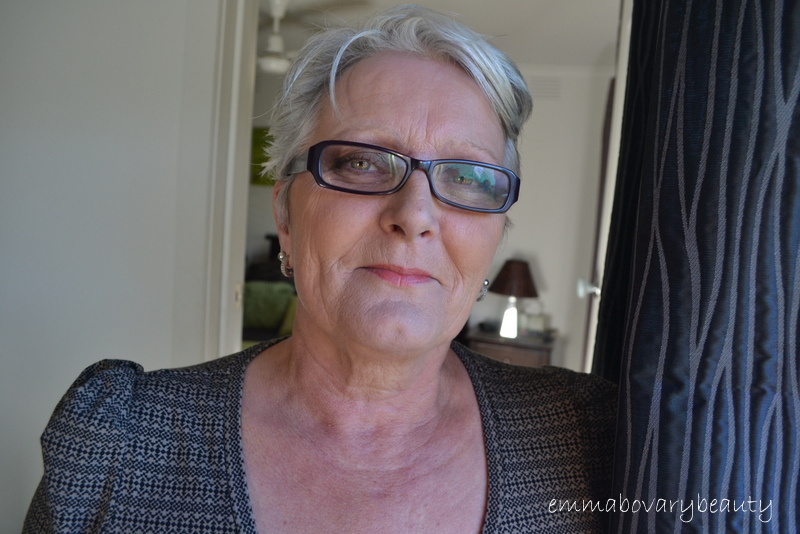
I thought that posting these gorgeous shots of my Mama was appropriate considering that Mothers Day is looming (Sunday 13th, in case you were unaware!) Mum rarely wears more than a swipe of liner or eyeshadow, but often asks me to muck around with my stash and make her over as we watch daytime TV on my days off.
I decided to try out a smoky eye look on her, and I don't think I've ever seen her with so much makeup on! She asked if I would do her makeup 'with some black eye shadow, I didn't even know black shadow existed!' She was actually dumbfounded when she saw me open a palette to reveal a black pan! How cute is that!?
I used a few new release products that I'm roadtesting at the moment, including a great smoky palette from bargain Australian brand BYS, which I'll be reviewing in detail next week. Here is a look at the new Animal Instincts* palette...
I used a mixture of all of the shades to create this look, along with the Jane Iredale Mystikol* powdered eyeliner and highlight duo (I only used the powdered eyeliner side for this look) This in part of a beautiful gift set that Jane Iredale has produced in time for Mothers Day, which I will be sharing with you this week.
The Jane Iredale lip plumper in Tokyo is the perfect shade for my Mum, I was elated when I popped it on her! It is also part of the new Jane Iredale gift set, and can be worn sheer or built up for a nice rosy glow on the lips. Mum noticed the tingling sensation after I applied it, but she couldn't decide if she liked the effect or not. I personally love a good tingle in my plumping products!
I wanted to see what Mum would look like with my favourite blush on, and I think it looks fab on her. Covergirl True Plum is a stunner, I've tried it on my sister as well and she looked amazing,too. What a winner of a shade!
I think the look works when Mum pops her glasses on as well, it still stands out and defines her eyes beyond her lenses. I think I will have to bite the bullet and get glasses soon, so it was nice to try out a look specifically for that. I used a bit of powder over her face to set the blush and just provide the slightest bit of coverage all over, as Mum doesn't wear foundation or anything like that.

What do you think of my Mums makeover?!
Do your family members ever rope you in to make them over?
What are your plans for Mothers Day?

(Items marked * were provided for consideration. Honesty, always.)

Wednesday, March 21, 2012

A Make Up Store makeover with Maria Gabriel

A while back I had the opportunity to get a makeover at the Make Up Store with the inspiring Maria Gabriel, who holds the position of Creative Director and General Manager of the Australia arm of Make Up Store. I was delighted to get a chance to learn more about a brand I wasn't entirely familiar with, and even more elated when I met friendly Maria and my makeover began.
Maria sat me down and we chatted about options for the look she was going to create. I told her that she had free range, but that I'd love to have gel liner applied as it's something I have trouble with.
A sneaky mirror shot, and you can see Maria rushing around behind me snatching up Make Up Store goodies to complement my mug. I mentioned that I did bright eye looks quite a bit so would love her to show me how to do a subdued look, so that is what we went with.
A subdued palette with a splash of purple, a colour that I find hard to use.
Maria began (after removing what I had on already) with the Skin Serum as primer, which glided over my skin and was very comfortable on.
Let me tell you, Maria had her work cut out for her because my skin has been really acting up lately, and she had a ton of bad skin to cover up! She said that my skin wasn't in as dire a shape as I believed it to be, and told me that porcelain skin naturally shows redness and imperfections more prominently than other skin tones so that it seemed much worse than it really was. Morale, boosted!
Maria used Cover All Mix which is a trio of concealer colours with high pigmentation, and can be mixed to the correct colour to hide blemishes, undereye areas and general pigmentation. Maria mixed a little of the Skin Serum in with the concealers on her metal palette in order to get a more fluid consistency for certain areas, which is a tip that I think is golden. She used this under the foundation, and said applying concealer either over or under foundation is fine by her.
She finished my face with Liquid Foundation in Cream and some Wonder Powder in Sahara. Getting to work on my eyes, Maria used a mixture of neutral shades over my lids, with a touch of purple in the outer corners. The chosen shades were Glam Peach, Sibiria, Boeme, Venus and the purple Flamenco.
Maria lined my eyes with black gel liner with brush #103 from their extensive brush range, which is an amazing teensy little brush that I would never think to use for gel liner! Stored that into my wishlist, along with some tips for application that Maria shared with me. I lamented my lack of gel liner prowess, and she said that feathering liner in from the outside inwards is the best way to go about it, as doing it the other way in one go will never work due to the natural squint of the eye! It makes sense when you think about it.
My completed look was subtle, with Maria using Old Rose lip pencil under Plumb lipstick and filling in my brows. I normally lean towards more dramatic looks with my eyes, so was happy to dip my toe into this sort of style.
Forgive the shiny forehead due to flash. This is the look complete with lipstick and brows.
It was a pleasure to have Maria share her wisdom with me whilst making me over, and she was also kind enough to gift with me a few Make Up Store products to play around with at home (I will have reviews of these up once I've used them a little more)

Thank you to Keryn who arranged this makeover, and to Maria for being so lovely. For more information on Make Up Store and to find your nearest counter (worldwide!) click here. They have great classes available as well, you should definitely check them out!

Have you tried any Make Up Store products?
I would love some recommendations! I have my eye on some of their shadows, they look amazing and I adore the sturdy and stylish packaging they are housed in.

Monday, October 24, 2011

Fresh and Innocent- Lara's FOTD

After watching my BareMinerals makeover, my niece Lara asked if I would do a makeover on her! I am always doing up my Mum's face when we're hanging about at home so didn't think anything of it, but I know her Dad (my brother in law) isn't a fan of his little girl growing up too quickly so made sure I kept the look simple and pretty, and appropriate for a 10 year old.
*
We went for shimmery eyes (she is a girl after my heart!) and perfect pink lips! I think the effect really enhances her amazing blue eyes and I added the slightest wash of shimmer to her cheeks to excentuate her adorable freckles.
A slighly blurry image but this is here to show you how nice the shimmery eye looks when the light catches it.
I used a thin layer of Face of Australia's Mini Mousse eye colour in Midas Touch over the whole lid, and amped up the shimmer even more by adding the golden champagne shade from the Clinique Strawberry Fudge quad over the top. The quad was a GWP from quite a while ago so I don't know the exact shade, but it can be substituted with any champagne shade you like. I then used Strawberry Fudge itself in the crease of the eye with a fluffy brush to add a little bit of dimension and sweetness to the look. No liner or mascara needed as I think shadow alone is best for this age.
I use these products on myself quite a bit so know that they are really wearable and good quality, so thought they were perfect for my nieces little face.
I've previously reviewed the Face of Australia Divine Shine Lip Plumper, and again you can see how stunning it is! I get compliments every time I wear this and Lara liked that it wasn't too sticky. Rather than being a glittery or sparkly shade, this has a great sheen to it that is natural but in a colour that is incredibly beautiful. For both Australian and International readers, these glosses as well as the rest of the Face of Australia range are available at Fashion Addict for crazily reasonable prices. They have pretty good prices on shipping, including International, so hop over there and check it all out!
Swatches of the products I used on Lara, including:
*Face of Australia Divine Shine Lip Plumper in Sterling Blossom
*Champagne and pink from the Clinique Strawberry Fudge Quad
*Face of Australia mini mousse eye colour in Midas Touch
*BYS loose shimmer in brush (you can barely see the swatch here as it is a very subtle shimmer, but Lara loves this type of packaging!)
How gorgeous does she look?! I believe that young girls don't need cosmetics to be beautiful, but I'll be honest and say I love her fascination with lip gloss and sparkle! She might end up following in her beauty-obsessed aunty's footsteps!
*
Do any young ladies in your family share Lara's lipgloss love?
Are you ever roped into doing family makeovers?
emmabovary xx

Thursday, October 20, 2011

A Makeup Revolution!

As a liquid foundation lovin' gal, I was dubious when asked to head into Kit Cosmetics for a makeover with BareMinerals by Bare Escentuals. My skin is quite dehydrated and can suffer from the dreaded flakies, and I had always feared powder foundation with a passion. My friend Candice was the polar opposite, and once I led her over to the liquid-foundy-dark-side, I decided to be fair and try this mineral foundation out.
I mosied on down to the Kit counter in Myer Melbourne with my mother and neice in tow, and was greeted by the stunning Leah Capponi, who is the National Makeup Artist for Kit Cosmetics. My Mum promptly fell in love with her, and wouldn't stop commenting on how passionate and attractive Leah was. Leah also made my neice swoon by complimenting her freckles and baby blue eyes, which was really cute, but I put on my blogger hat and got down to learning about BareMinerals.
A makeup revolution? Intriguing! Leah shared the BareMinerals story with me from it's inception, and I was fascinated to learn that if you had to sleep in any makeup, this would be the safest option. As a lazy lady, I appreciate knowing that it I slip up my skin won't hate me as much as it otherwise would. I haven't slept in this (yet?) but it's nice to feel reassured anyway.
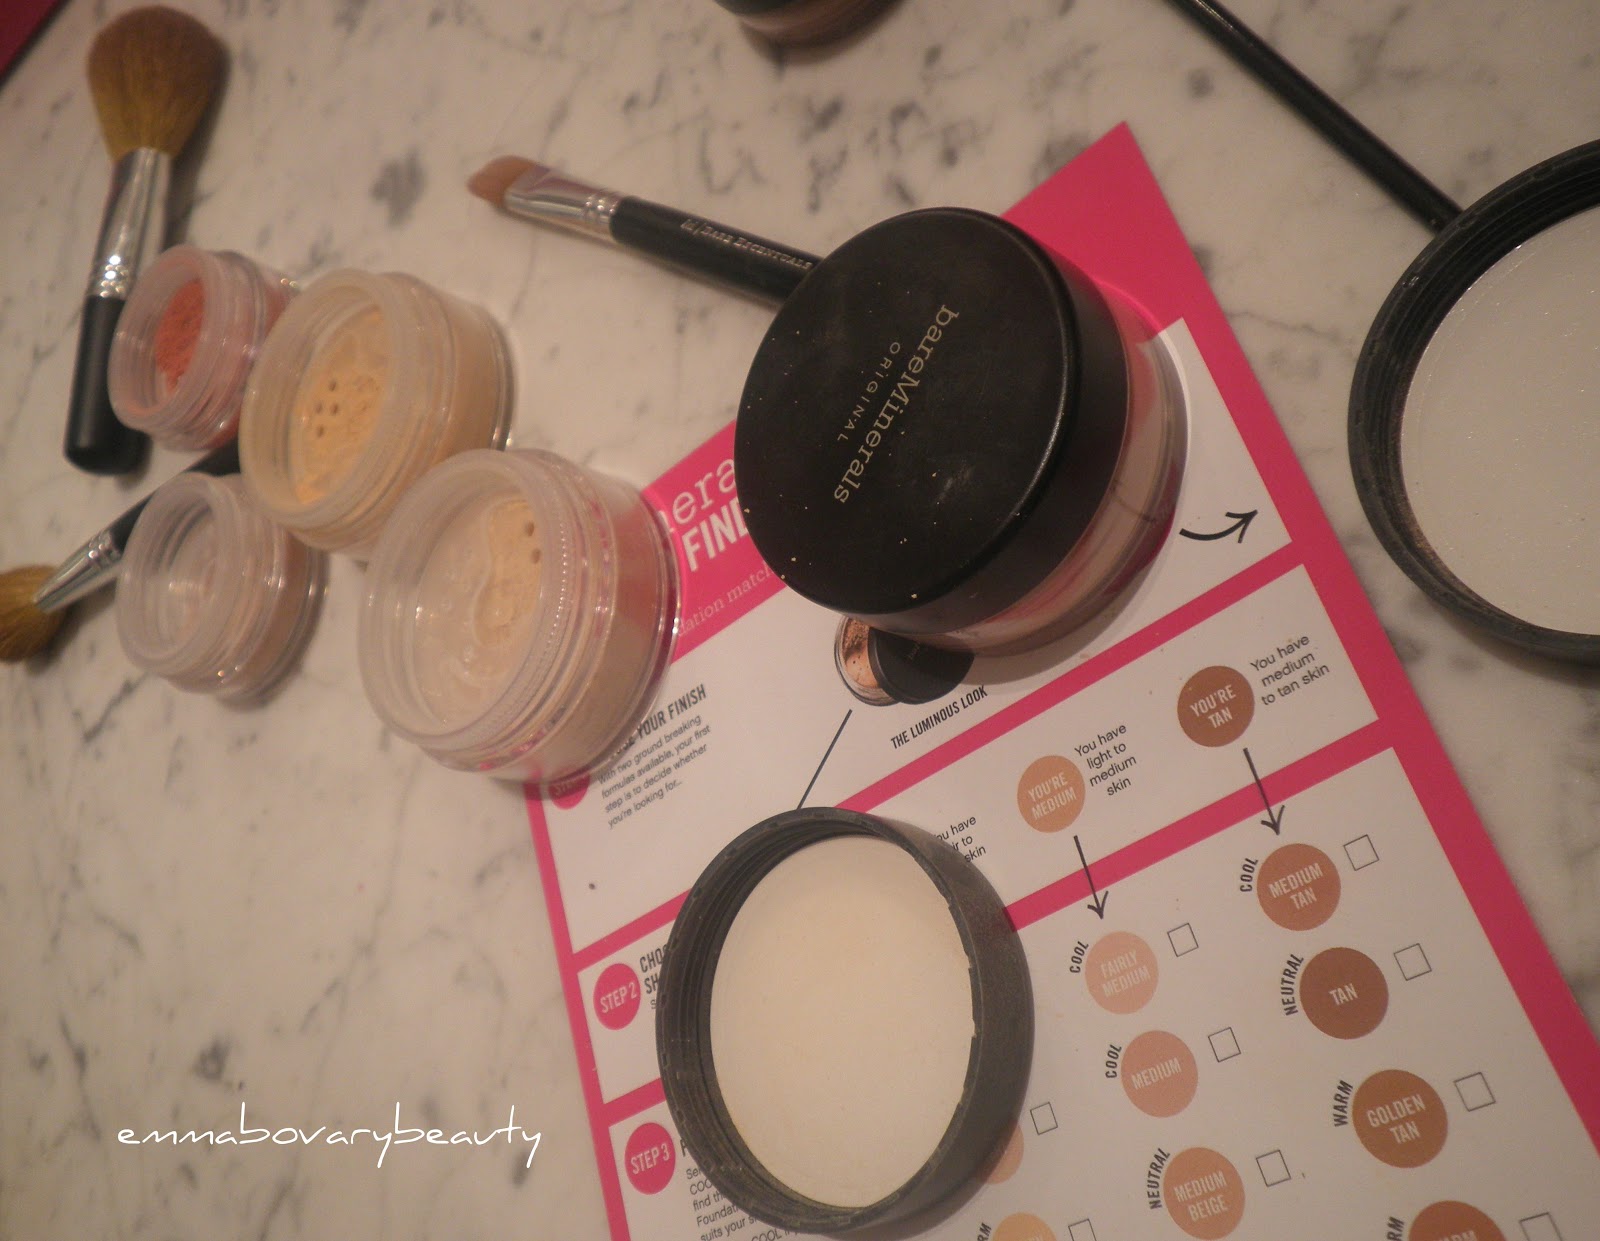
Leah went over the two options for the range, which was a matte foundation option or one that creates a more luminous canvas. I went for luminosity, of course, and before that was applied Leah applied the BareMinerals primer on me. I was colour matched to the lighest shade within the range ('Fairly Light') and she mentioned that my Mum would be matched to the darker shade within the light family, simply named 'Light'. As I sipped my Pelegrino, Leah buzzed around me, constantly dropping pearls of wisdom as she buffed me to perfection.
Whilst you have the option to purchase items from the BareMinerals line separately, they have created a starter pack which I think is great value and the easier option (IMO).
The pack contains two versions of a shade, for example my LIGHT kit contains a 'Fairly Light' as well as a 'Light' so it is perfect for those who swing between shades in summer and winter. A sample of the primer helps make sure your application at home goes smoothly (ha!), and a pot of concealer is supplied to let you cover up anything the foundation didn't manage to. I would say this is medium to full coverage foundation, at least it is on my face. The pot of 'Warmth' within the starter pack acts as a bronzer substitute. You use it in the same spots you would a bronzer, but it creates a much more natural and wearable healthy glow to your look (despite it looking scarily dark in pot, it isn't dark at all) A mineral veil adds some highlight and luminous to your face, and voila! You're lookin' good!
With the amazing Leah- stunning, right? And nice. And intelligent. The lady has it all!
Brushes and an instructional DVD are also supplied with the BareMinerals Get Started kit, which enforces the importance of the method with which you are to apply these products. Say it with me now:
SWIRL > TAP > BUFF
Shake a little bit of product into it's lid and swirl your brush all up in it. Tap the brush on the edge to get rid of any unneeded excess, and buff it into your face. When you think you're done buffing? Buff some more. The more you buff, the better it looks, in my experience. I tend to think of it as a free arm workout with my makeup ritual, but it does take a bit longer than my usual slapping on of liquid foundation, so I tend to use this on weekends or days off when I have time to play with makeup looks and take more time with ita all. This is what was in the pack that Kit Cosmetics and BareMinerals kindly gifted me after my makeunder(which was to celebrate the launch of BareMinerals within Kit stores)
The sexy box that it all comes in, information booklets, instructional DVD and 'Prime Time' primer sample.
A face brush, a smaller face brush and concealer brush. Two pots of SPF15 foundation, one pot of 'Warmth', one pot of 'Mineral Veil' and a pot of concealer. See what I meant about value? This is the perfect kit for someone just starting out in makeup as you can get a sheer coverage with it or build it right up, and you get all the tools you need to nail application. For $84.95, I think this would make a really nice Christmas gift, too. I've used these products on my face as well as on my best friend Candice's, and they're lovely. For someone who had a fear of powder, that says a lot.

The BareMinerals range of products is now available at Kit stores Australia wide, click here to find stores near you. The Get Started kit is valued at $144.95 and retails for $84.95
If you are interested in experiencing a 'makeunder' of your very own there are some available in the coming days- click here for more information and to book in with Kit.
( visited Kit Cosmetics as a guest of EGPR and would like to thank them for the invitation. The Starter Kit was provided as a gift but does not affect my opinion or review of the products within.)

Monday, August 8, 2011

Viva La Colour with Kit Cosmetics!

I was lucky enough to be invited along to Kit Cosmetics to get my face made over, to celebrate the Mexican-inspired Viva La Colour collection they have instore. I went along with the beautiful Melissa , who has also blogged about the experience here. Kit is always one of my first stops when I visit the city, the staff are super helpful without being pushy and the range is kept fresh. The store stocks the Kit brand as well as other winners such as Mario Badescu, Smashbox and Too Faced. If you have never been into a Kit before, try and swing by- it's amazing in there!
Products in the Viva La Colour collection
My gorgeous MUA Caitlin was rocking a seriously bright face, including a fuschia lip using a lippy from the collection. I chose to incorporate bright eyes as well, but with a tangerine lip to mix it up a bit.

The empty Kit stand, as we were using most of the goodies!

My skin was cleansed-toned-moisturised before the fun began!

The base being applied.
I have the biggest lemming for the new foundation Caitlin chose for me, the new Mineral Liquid Powder Foundation ($44.95) I was matched to the shade Light, and I found that my flakies weren't accentuated and my skin looked great well into the night. Very impressed with the kabuki that was used, it was so soft I sighed when my foundation was being applied!
Colour was introduced
I was fascinated with the yellow that Caitlin had used on Melissa before me, and so we used that paired with the pink above, and lined the lower lashline with the purple from the top of the image. I don't usually choose purple for my eyes, so was happy that Caitlin had made me branch out.
'Wow Factor' eyeshadow

The completed look!

Caitlin, Melissa and Moi

A dopey face, but how bright is that shadow! Squee!

Flash made me super-shiny, looked much better in person. Was at home at this point, hence the change in lighting.
 
Caitlin and myself, in front of the gorgeous Viva La Colour stand
At the end of my makeover Caitlin asked what my two favourite products were, and wrapped them up for me! I chose the cheek and lip duo I'd been lemming for ages, and the Fire Lighter lipstick.

My beautiful gifts!

Fire Lighter and 'Pretty Cheeky' duo
Overall the whole experience was wonderful, and reminded me that bright makeup doesn't have to be scary and intimidating. With the right technique you can pull off looks you have always dreamed of, but you never know if you don't try! A big thank you to the EGPR beauties, Caitlin and the Kit team for having me.
emmabovary xx


*All images were taken with my camera and belong to me. I was a guest of EGPR and Kit Cosmetics for this event, and though I was kindly gifted two products it in no way affects my review of the experience.
Related Posts Plugin for WordPress, Blogger...